AI Image Workflow Automation: Chain Your Whole Jewelry Photo Pipeline Into One Click
If you sell jewelry on Etsy, Amazon, or Shopify, your product imagery is probably built like an assembly line you run by hand. Try-on in one app. Download. Re-upload to a retoucher. Download again. Open a creative photo tool. Then a video maker. For every single SKU.
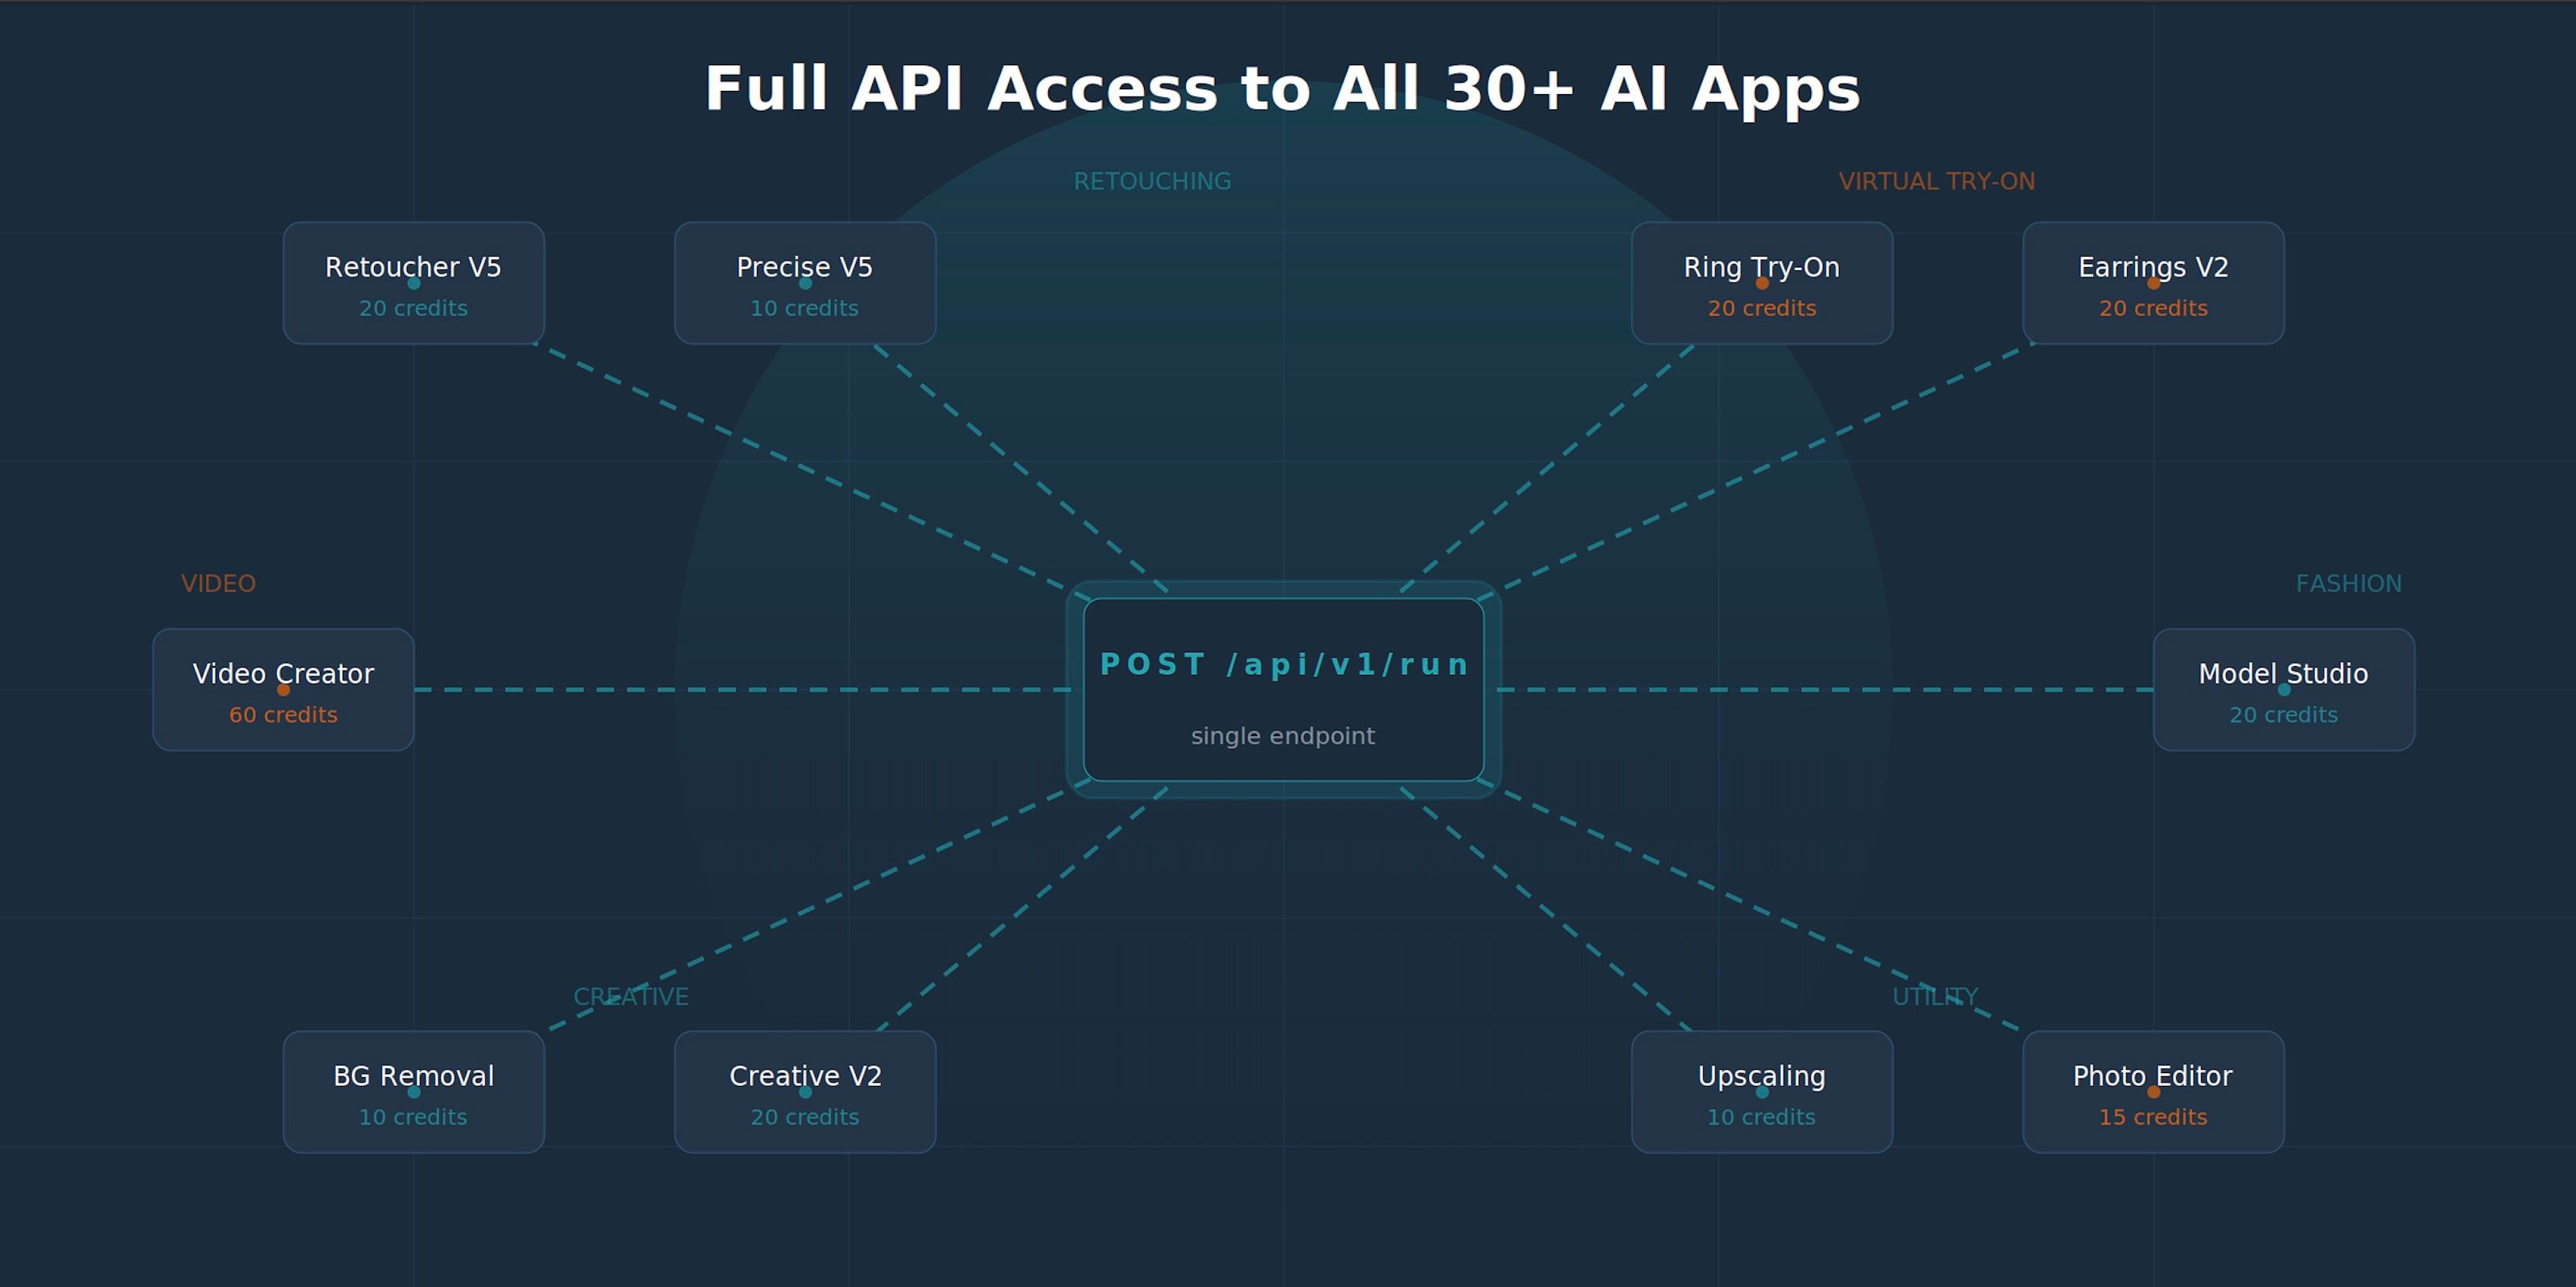
That manual, app-by-app grind is exactly what NeuroViz Workflows kills. This new feature is AI image workflow automation built for sellers: connect multiple NeuroViz apps on a visual canvas, let each app’s output feed the next, and produce a full image and video set in one click. Here’s what it is, how it works, and how to run it in batch.
The Problem: You’re Doing Batch Product Photo Editing One Tab at a Time
A polished jewelry listing isn’t one image. It’s a try-on shot, a clean retouched product photo, a creative lifestyle frame, and a short video. Today, most sellers create those by jumping between four tools and re-uploading the same piece four times.
That workflow has three hidden costs:
- Time tax — every download-and-re-upload step is dead time, multiplied by every SKU in your catalog.
- Quality drift — manually moving files between tools invites the wrong version, the wrong size, the wrong crop.
- It doesn’t scale — 5 products is annoying; 200 products is a full week you don’t have.
NeuroViz has processed 1M+ images for 500+ businesses, and the single biggest bottleneck we hear about isn’t quality — it’s the manual hand-off between steps. Workflows removes the hand-off entirely.
What NeuroViz Workflows Is
Workflows is a visual canvas where you chain NeuroViz apps so each app’s output automatically feeds into the next. Steps that depend on each other run in sequence; independent steps run in parallel. One click produces the entire set — try-on image, retouched image, creative photo, and video — with no re-uploading between stages.
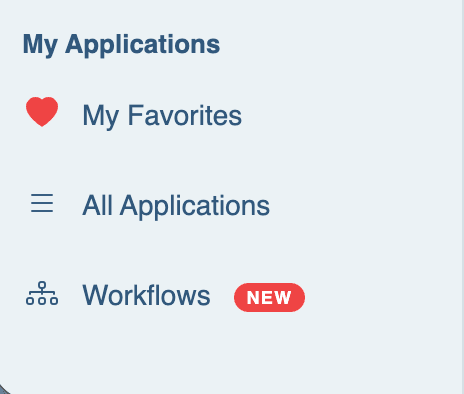
You’ll find it in the left navigation under My Applications, marked with a red NEW badge. The first time you open it, a short guided tour runs automatically — you can replay it anytime from the ? icon in the topbar.
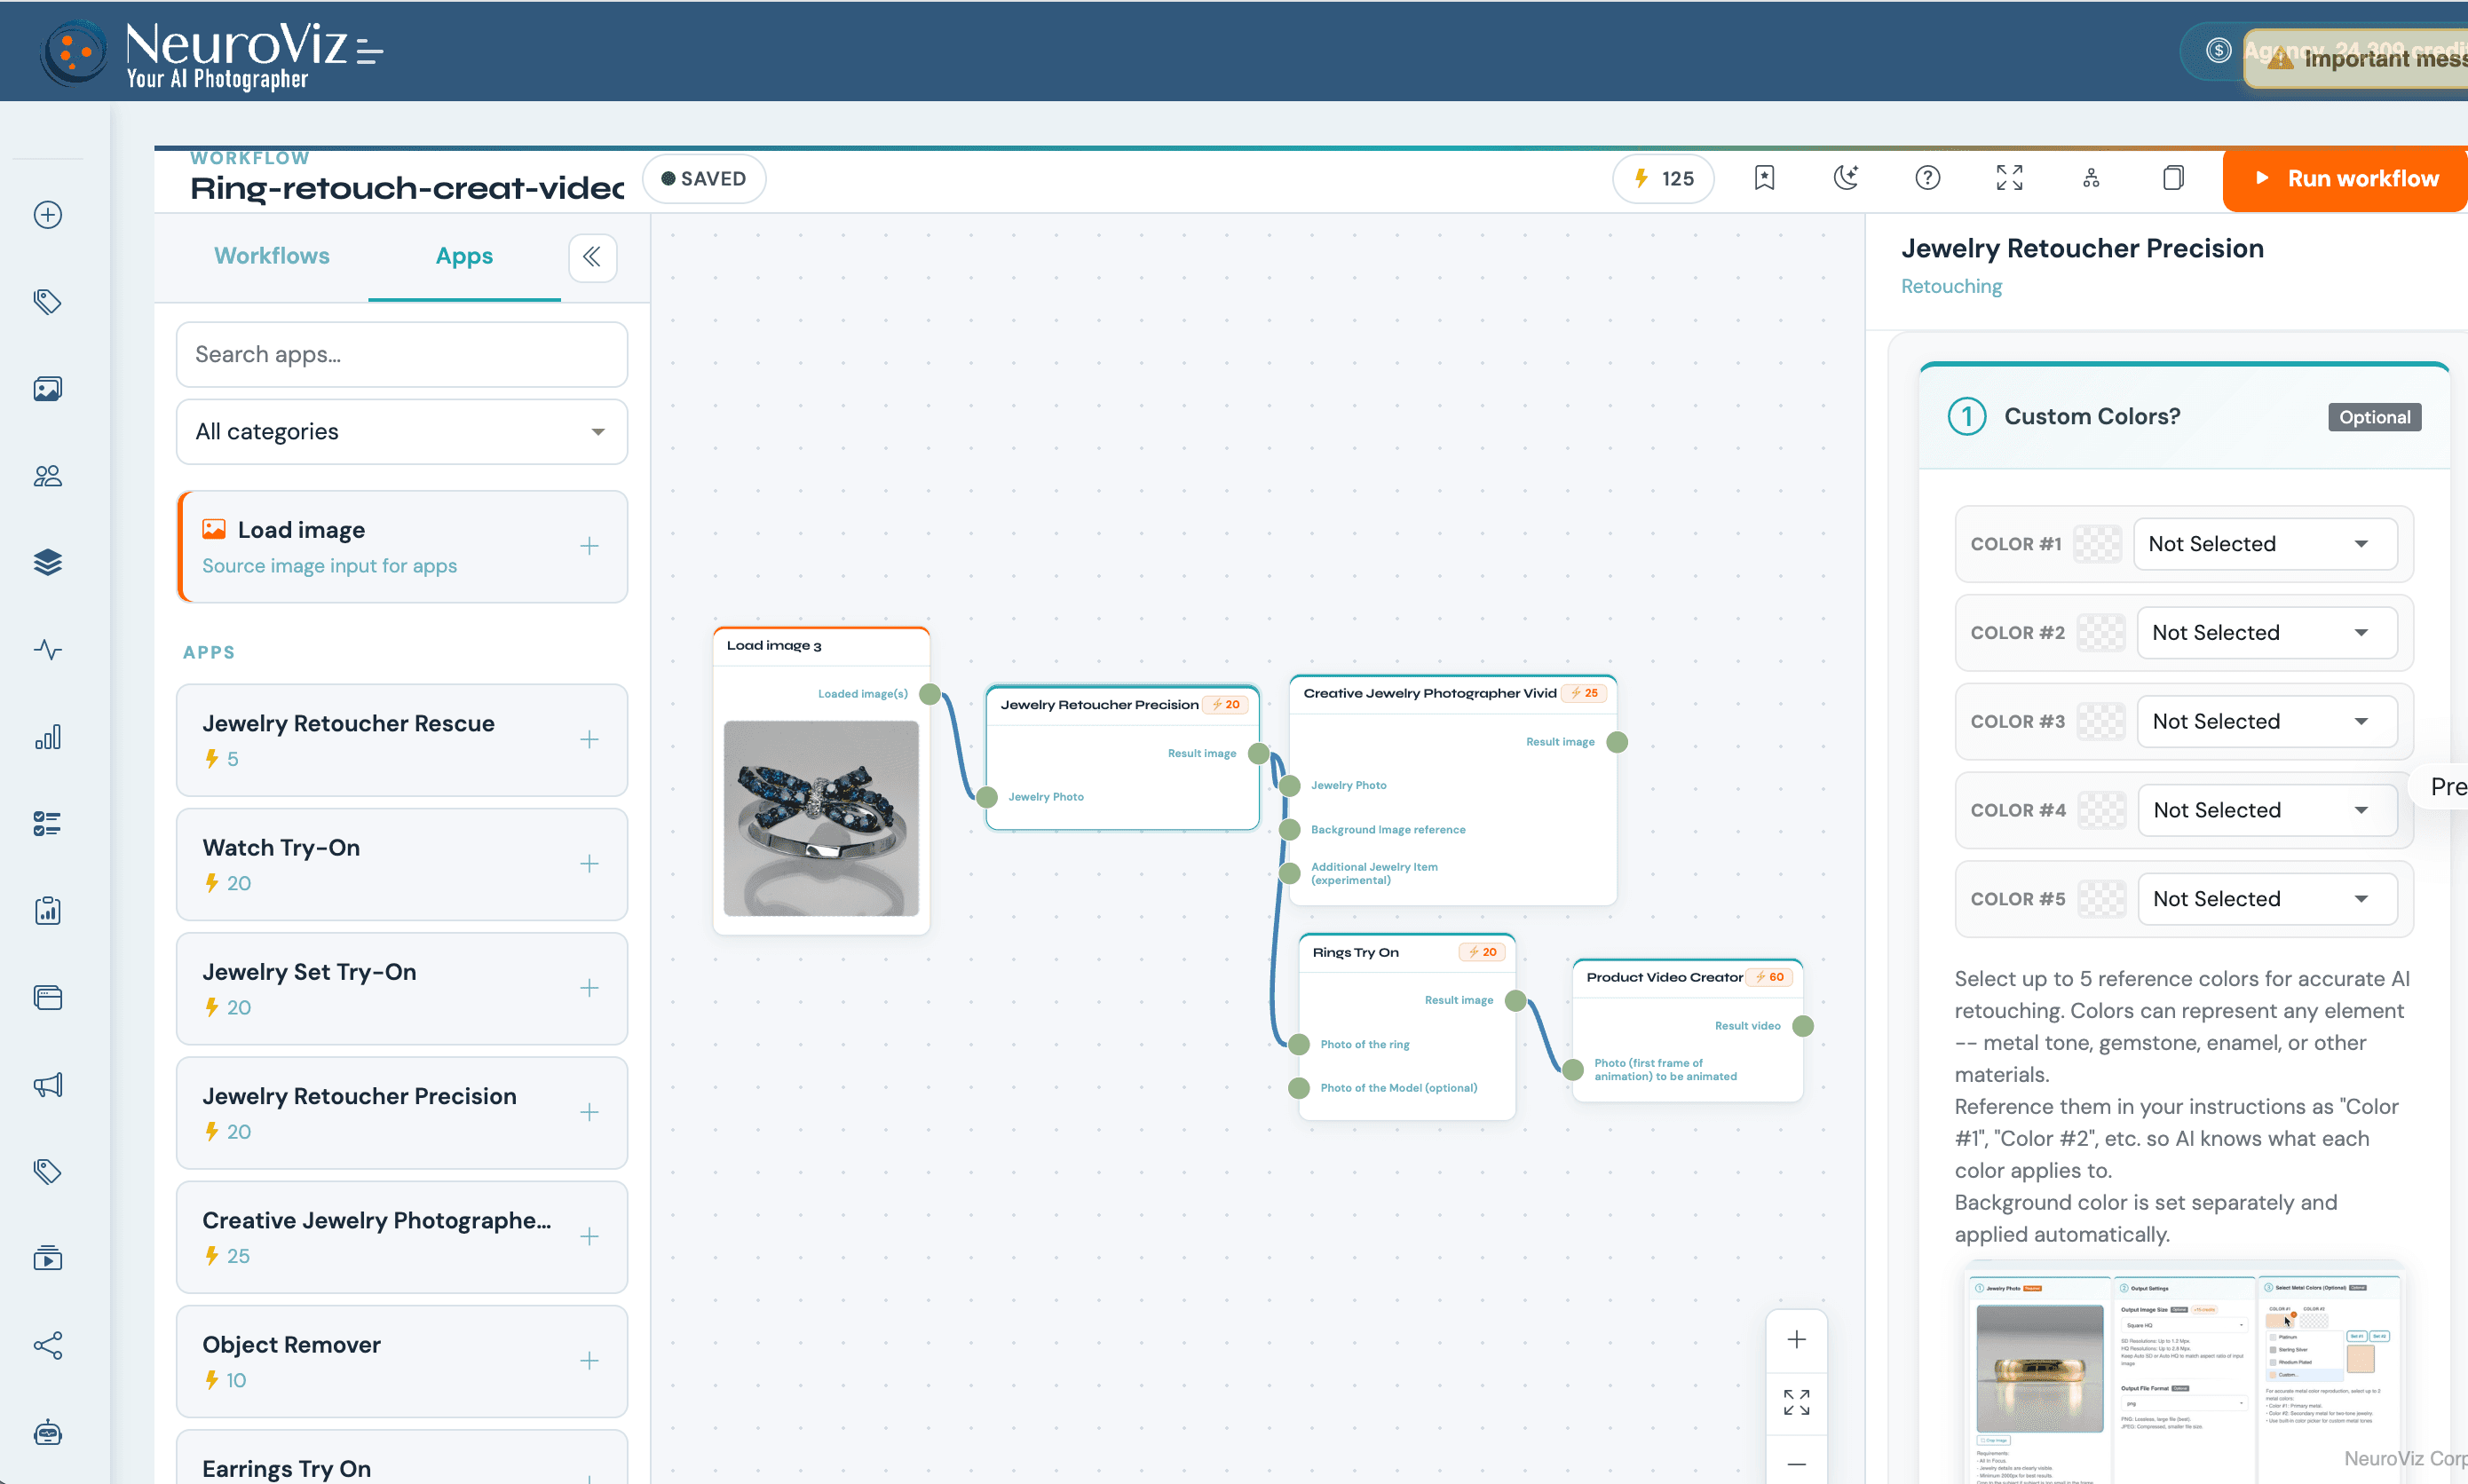
The layout in 20 seconds
- Topbar — editable workflow title, draft/saved status, live total credit cost, the Run workflow button, plus theme toggle, fit-to-view, auto-arrange, clone, and save controls.
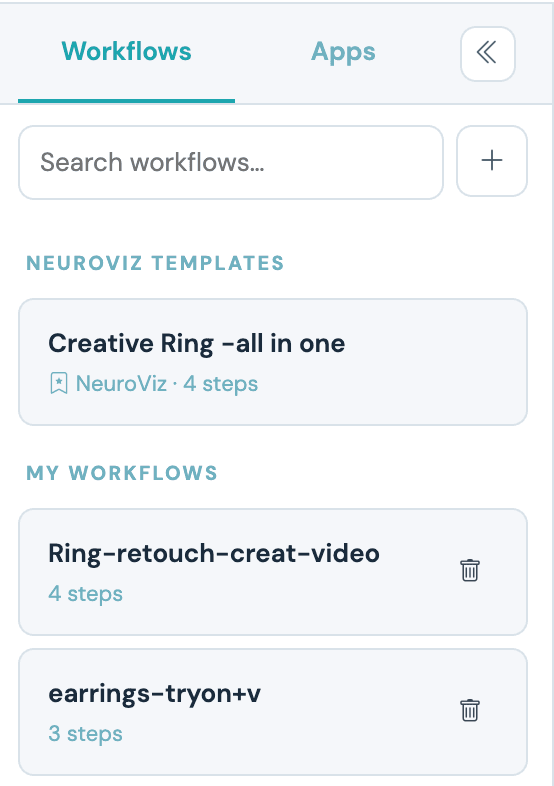
- Left rail — two tabs: Workflows (your saved pipelines + NeuroViz Templates) and Apps (every NeuroViz app, with the Load image source pinned at the top).
- Canvas — the dotted work area. Drag the background to pan; scroll to zoom (or use the +/fit/− widget bottom-right).
- Right rail — the Properties panel for whichever node you’ve selected. Same controls you’d see in the standalone app.
How It Works: Build a Pipeline in Five Steps
You don’t need any technical setup. Building a workflow is drag, drop, and wire.
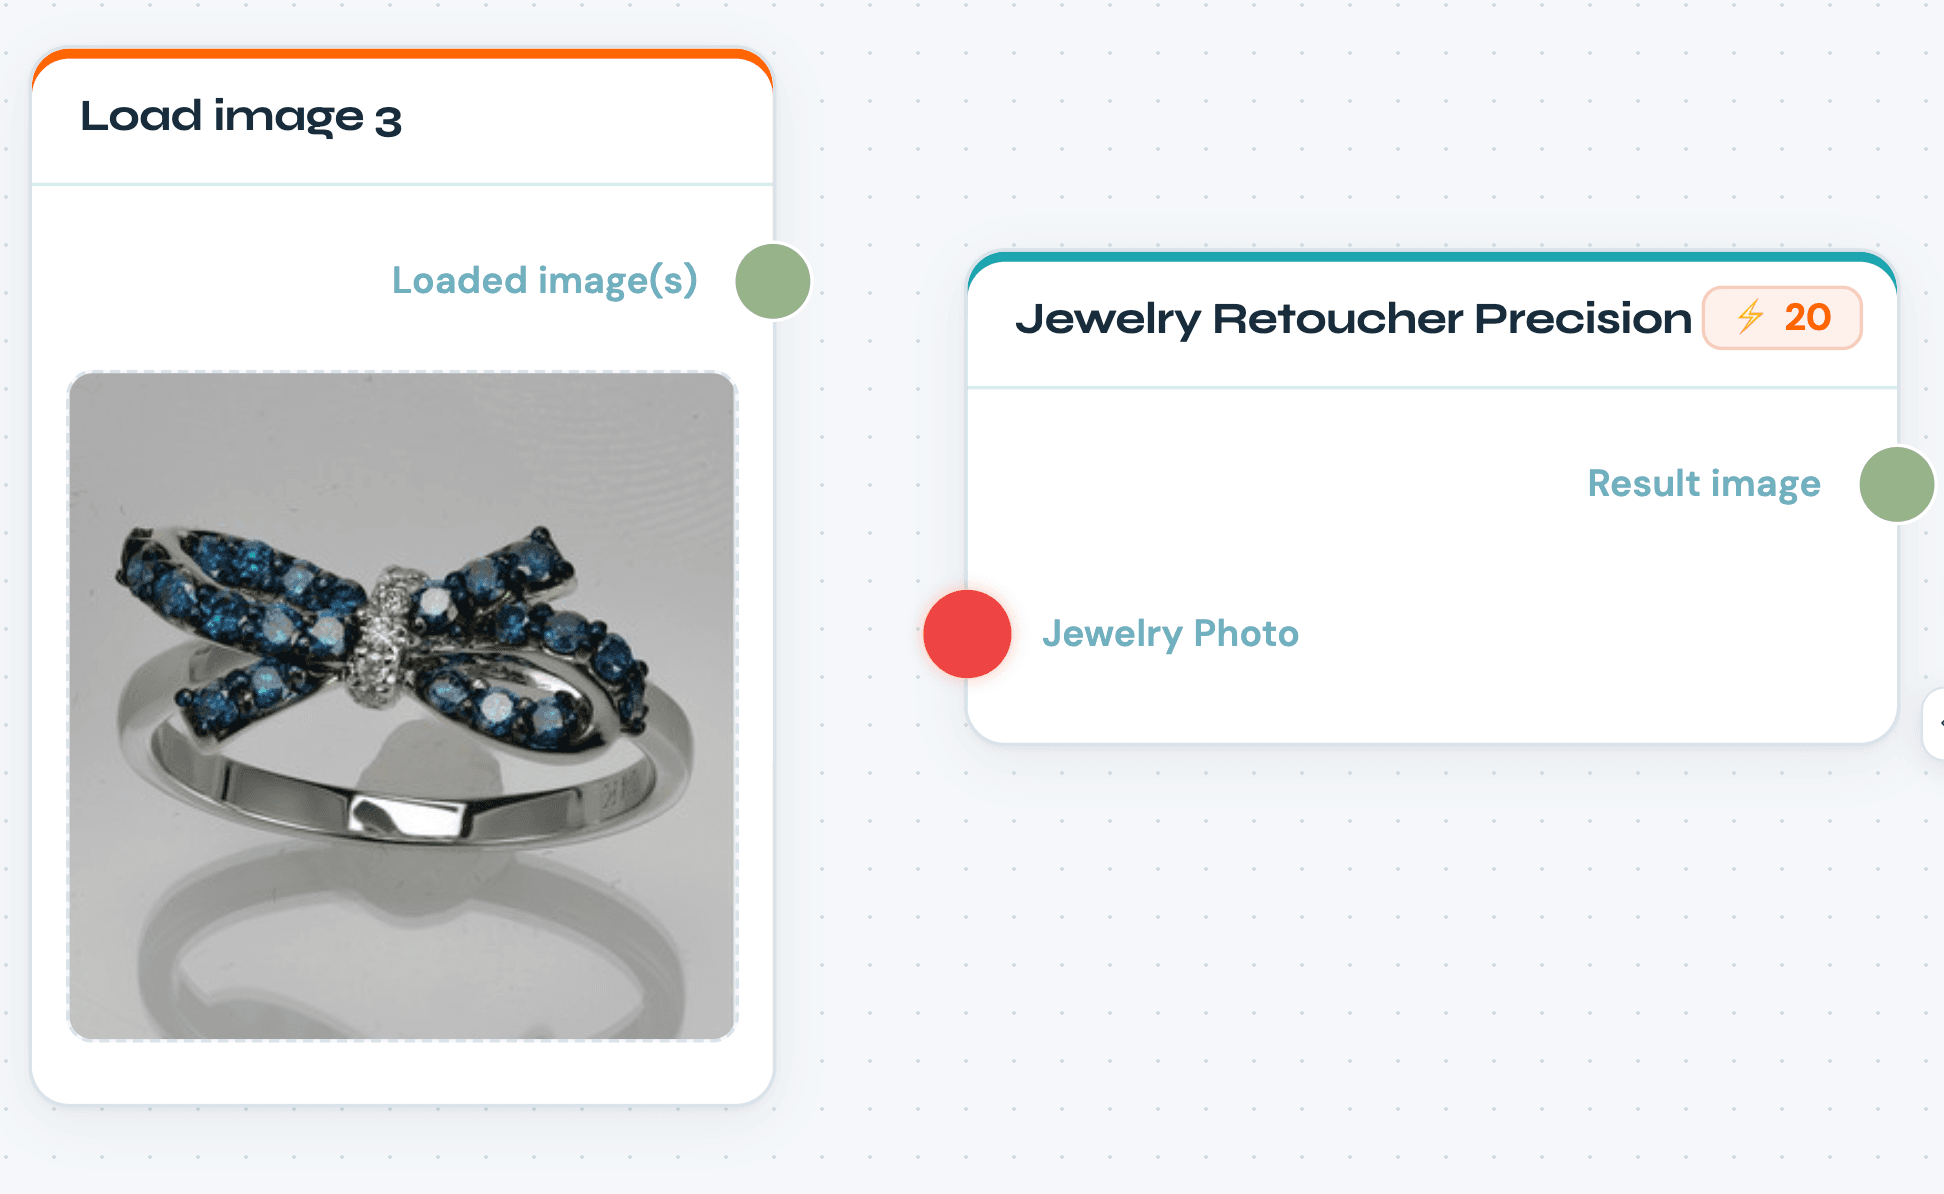
- Drop a Load image node. Open the Apps tab and place a Load image source on the canvas. Click its dashed thumbnail to pick a photo from your gallery.
- Drop your apps. Add the NeuroViz apps you want to chain — Try-On, a Retoucher, Creative Photographer, a Video Creator. Each node shows input ports on the left (e.g. “Photo of the Ring”, “Background reference”) and an output port on the right (“Result image” / “Result video”).
- Wire the sockets. Drag from Load image’s Loaded image(s) socket into an app’s input socket. Sockets are color-coded: red = a required input still needs wiring, green = connected or optional. Chain further by dragging one app’s Result image into the next app’s input.
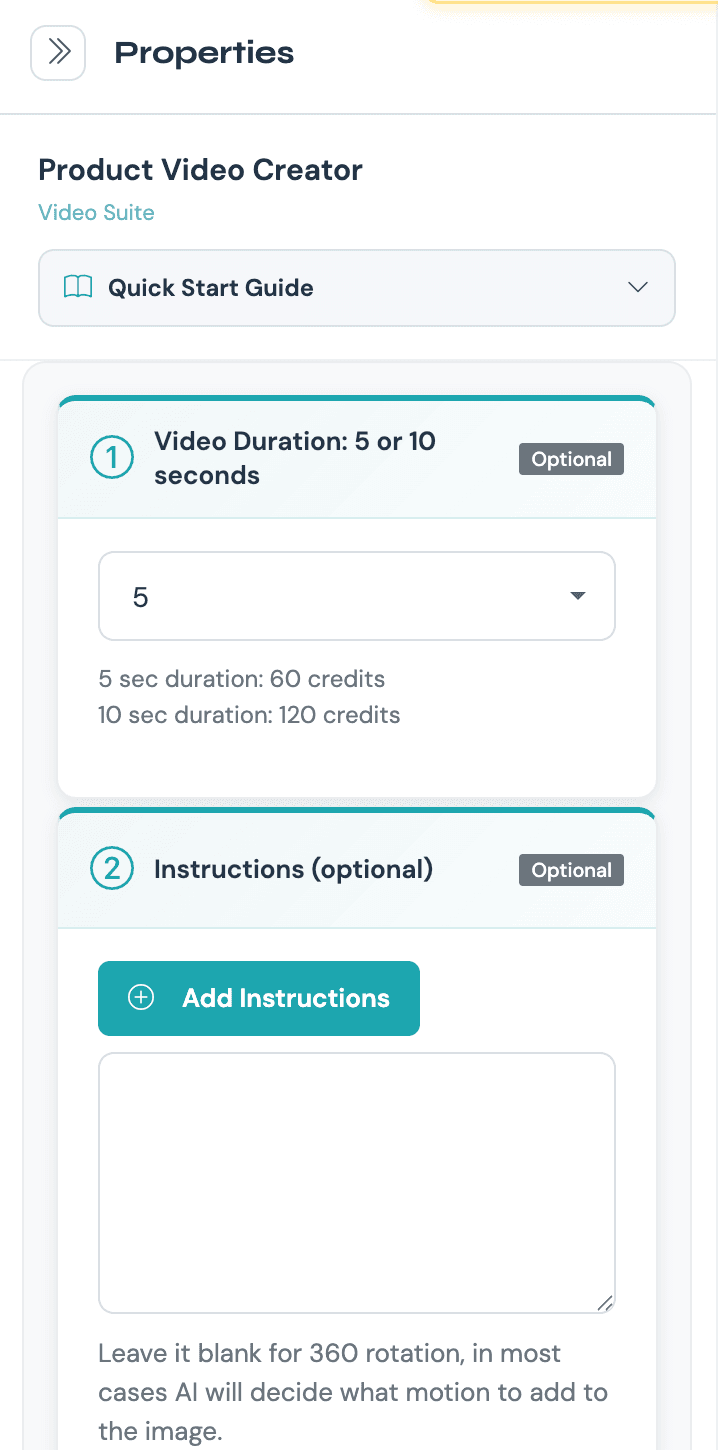
- Set parameters. Select any node and configure it in the right-hand Properties panel — quality, size, instructions — exactly as you would in the standalone app.
- Check cost, then run. The topbar shows the live total credit cost (the sum of every step). When every required socket is green, hit Run workflow.
A Worked Example: The “Creative All-in-One” Pipeline
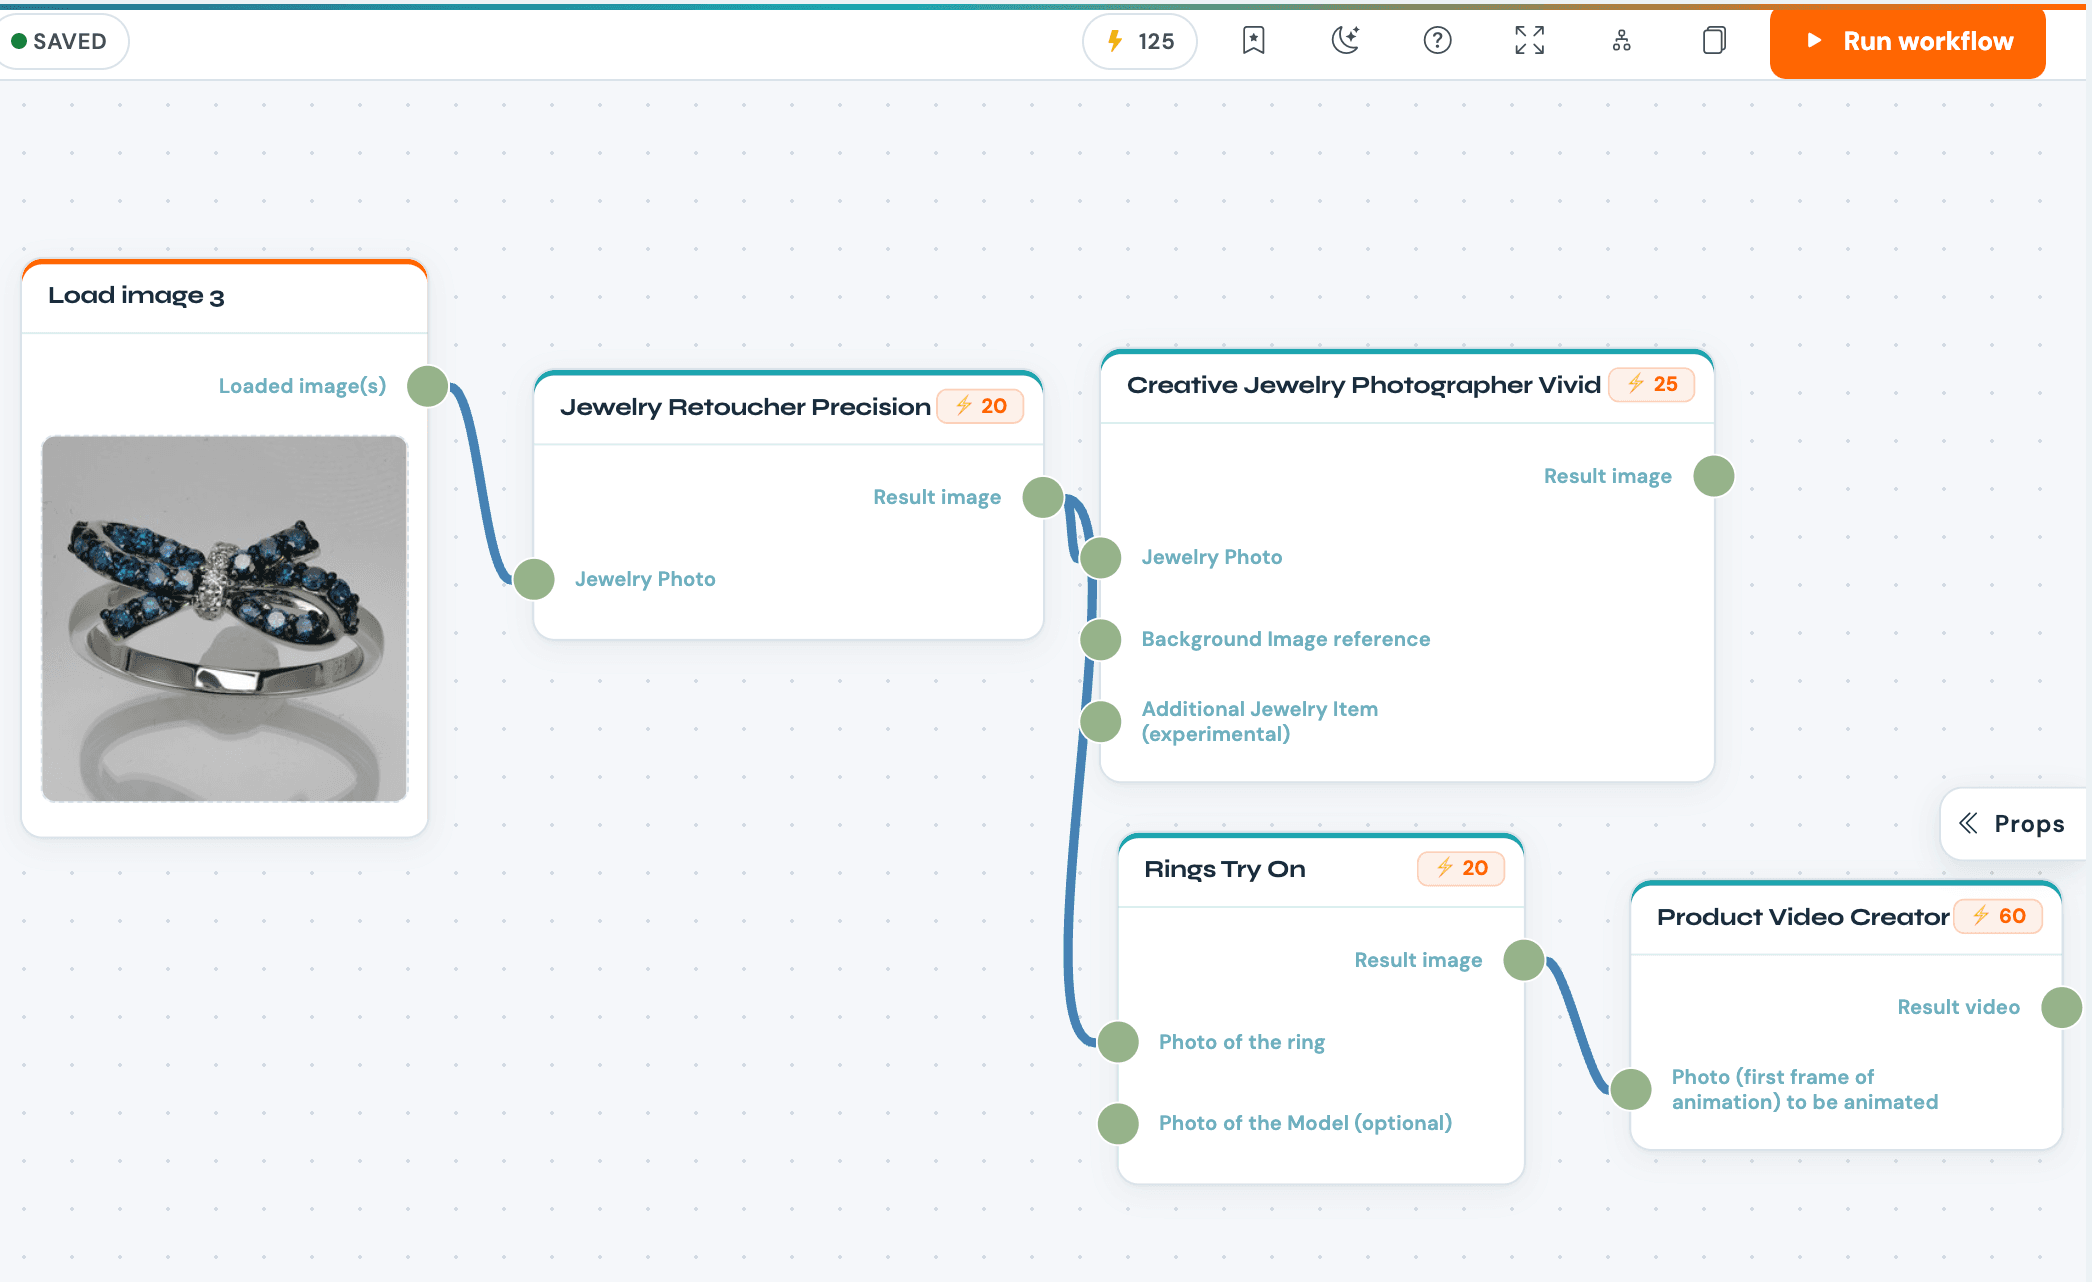
Here’s a single workflow that produces four assets from one ring photo — the exact pipeline our founder demos:
- Load image — your raw ring photo.
- Ring Try-On — places the ring on a model. (Required input = ring image, in red until wired; model image is the optional green input.)
- Rescue Retoucher — cleans up the ring. Chain it before placement if the source really needs it, or run it in parallel if the original is already decent.
- Creative Jewelry Photographer — generates a styled studio/fabric shot of the ring. Optionally feed it a Background reference image for art direction.
- Scene Video Creator — takes two inputs: the creative image as the first frame and the model try-on image as the last frame. It generates a smooth transition video between them.
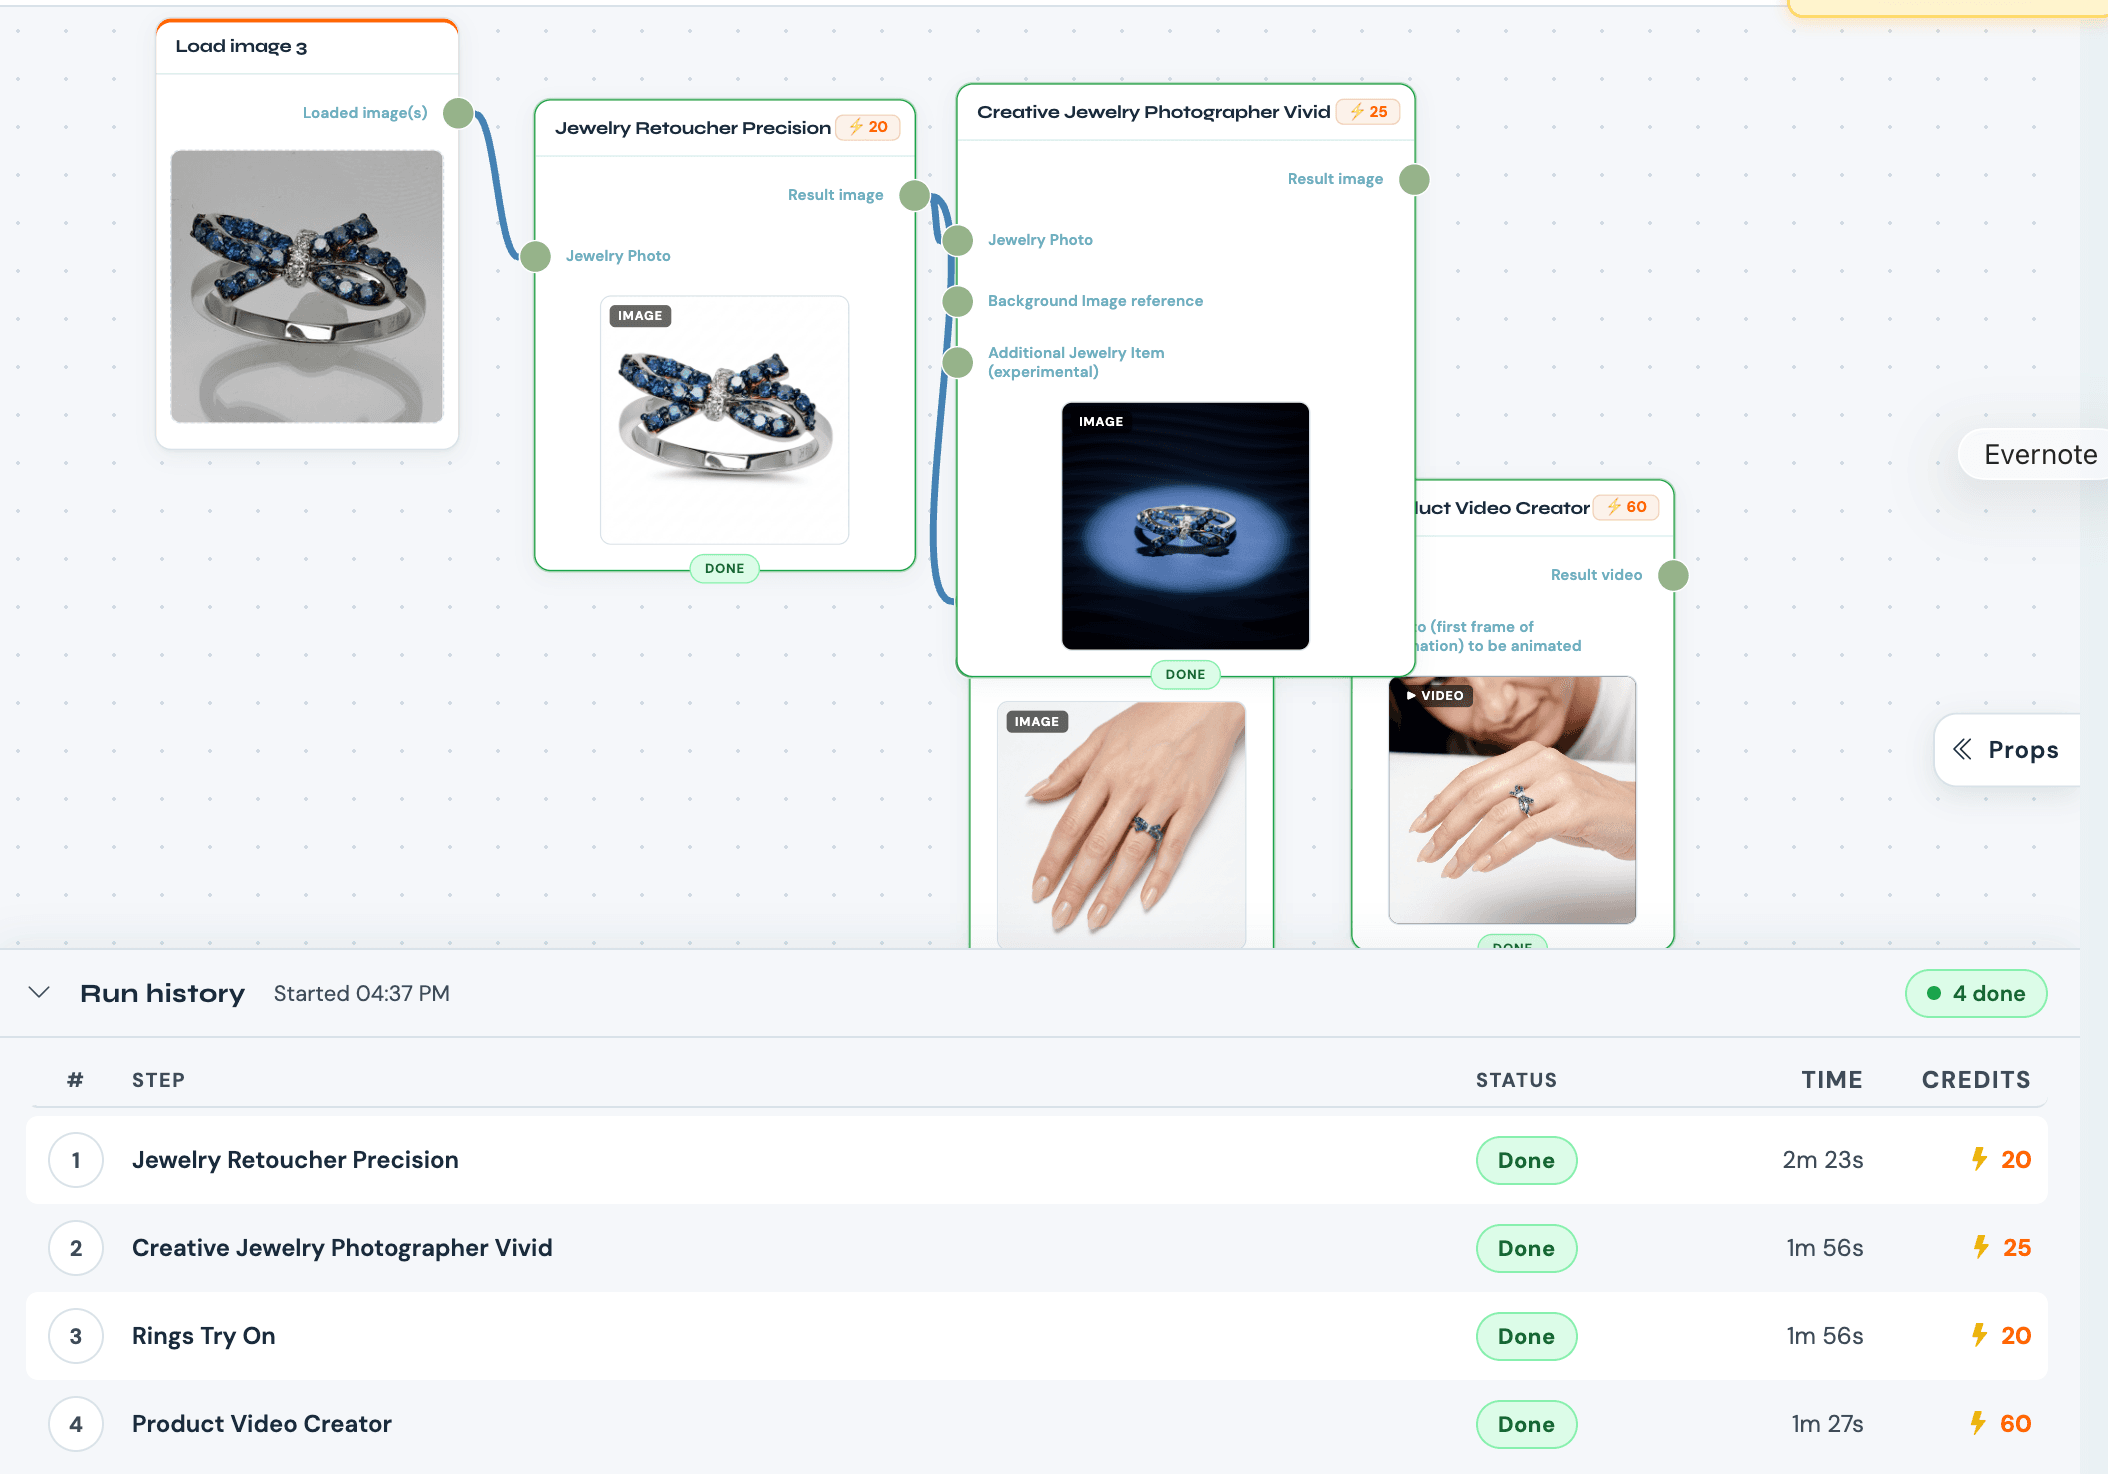
One click. The result: a try-on image, a retouched image, a creative photo, and a transition video — a complete listing-ready set, no re-uploading between any stage. Per-step credits show inline (e.g. medium quality ≈ 20 credits each), and the topbar totals them live so there are no surprises.
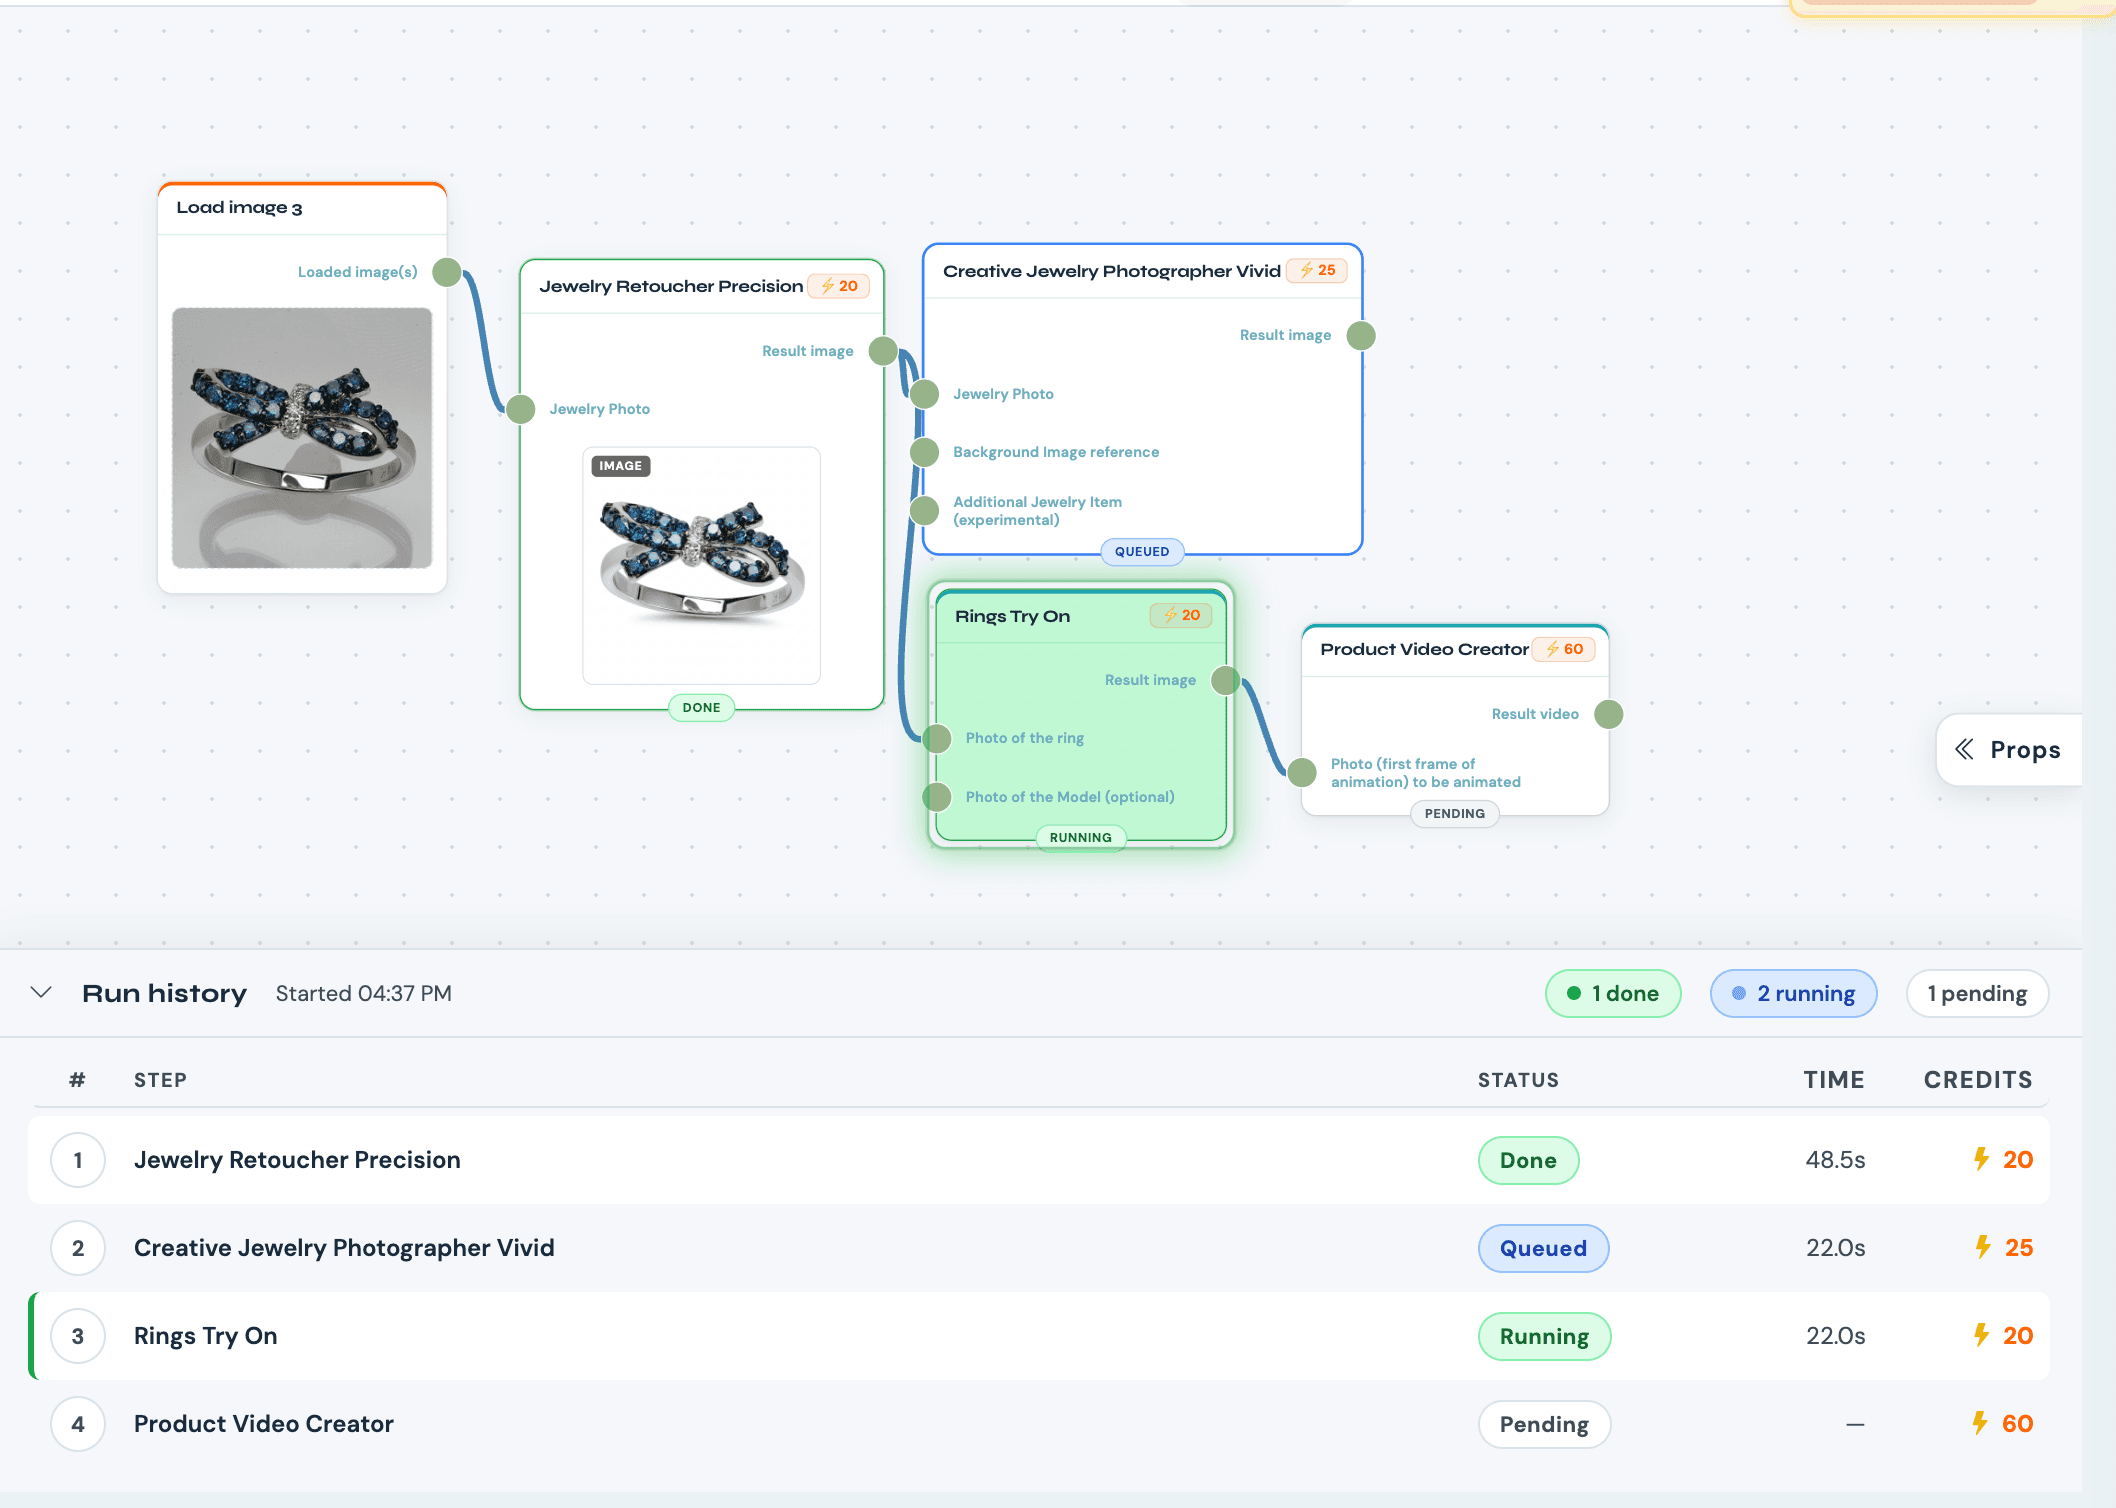
When the run starts, each node gets a colored status outline, the active step pulses green, and a status pill tracks Queued → Running → Completed. Completed nodes show inline thumbnails — click any one for a full-screen preview. Everything lands in My Gallery like any other generation.
Batch Product Photo Editing: Run the Whole Catalog at Once
This is where AI image workflow automation pays off for serious sellers. Build the pipeline once, then run it across an entire batch of products.
Batch requires a Membership or Pro Plus / Agency plan. Single-image workflows run on any plan, including the free trial.
To batch:
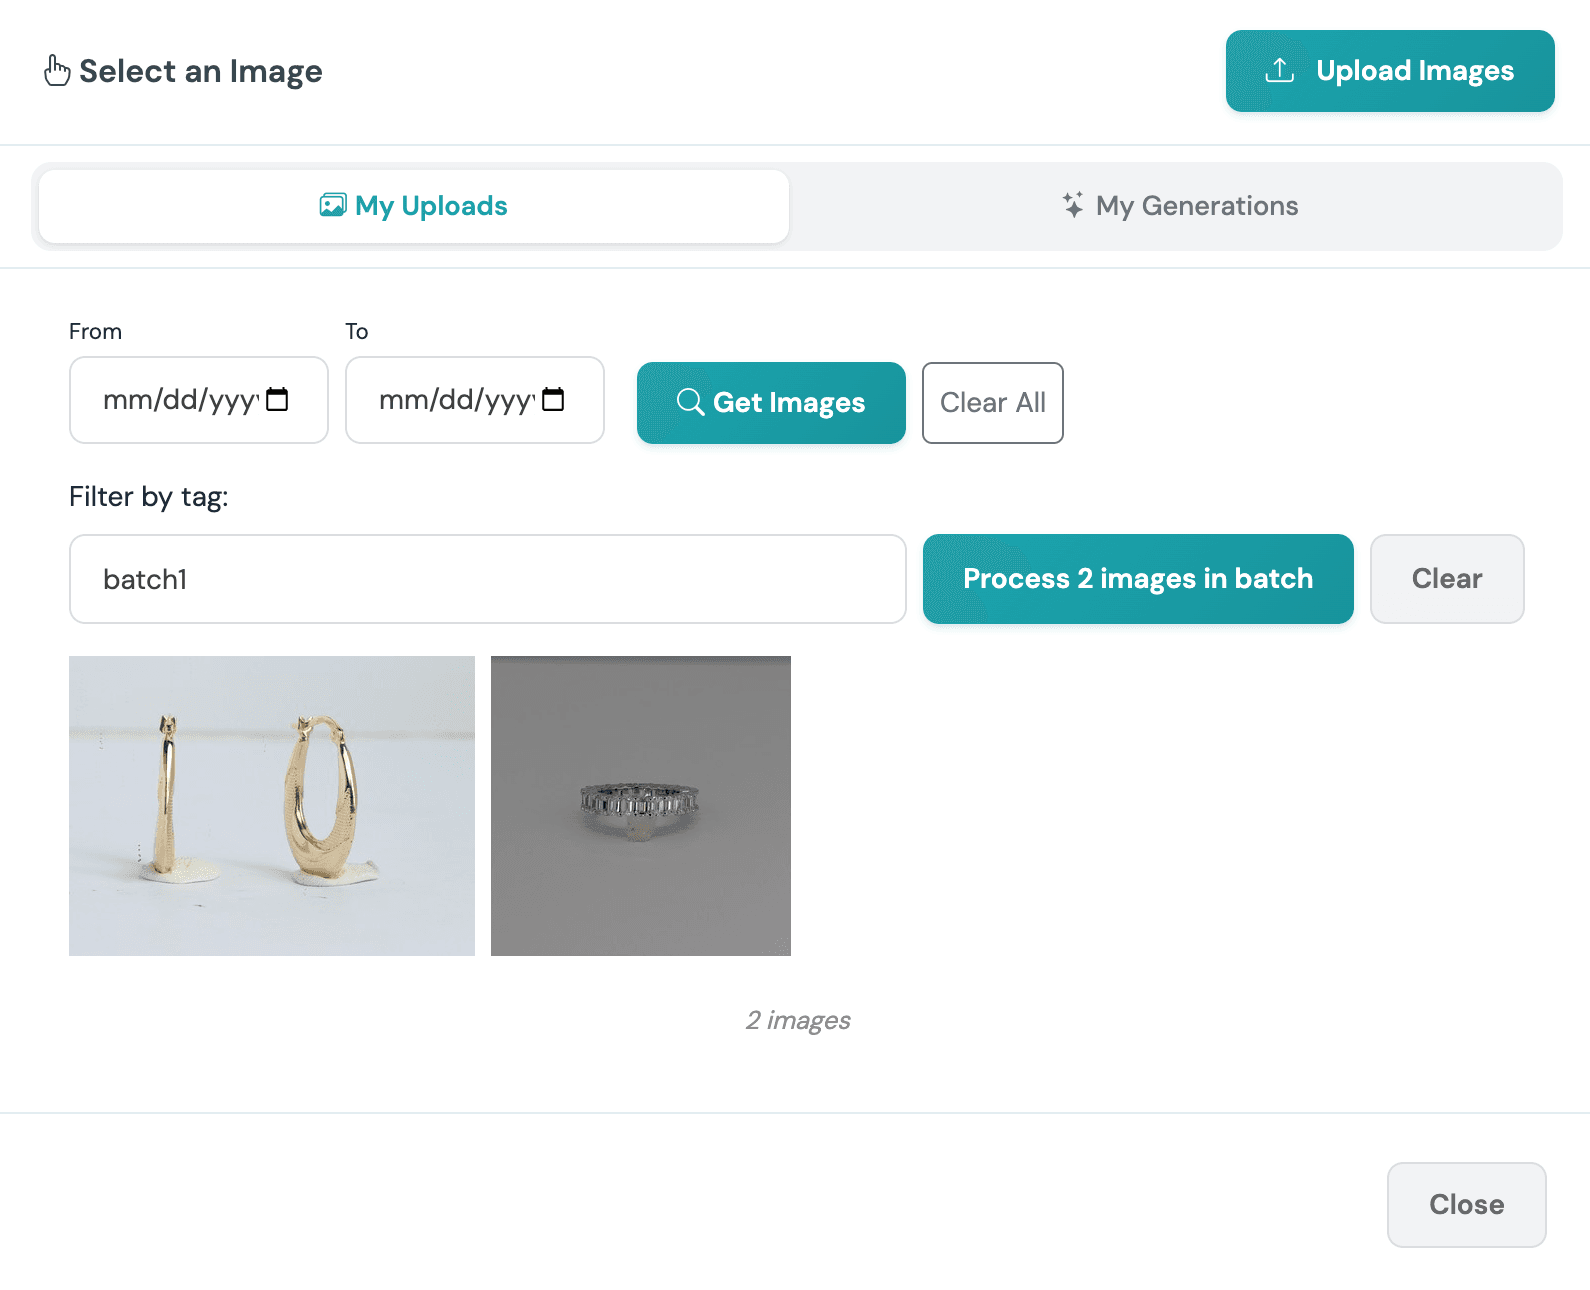
- Click the Load image thumbnail and, instead of picking one image, choose a tag and select Process image in batch.
- The Load image card gets a teal “Batch · tag (N)” badge.
- The topbar cost pill recalculates to per-run cost × N (it turns red if you don’t have enough credits).
- Hit Run workflow. It fans out into N runs — one per tagged image. The editor live-tracks the first run; the rest queue silently and surface in My Gallery as they finish, with batch stats.
One powerful pattern: a batch of products against one fixed backdrop. Only one Load image per workflow can be the batch source — any other Load image stays single and is shared across all N runs. So you can batch 50 different rings while every one gets the same branded background reference. Perfect for a consistent catalog look at catalog scale.
NeuroViz Templates: Don’t Start From Blank
You don’t have to design every pipeline yourself. Open the Workflows tab in the left rail and look under NeuroViz Templates — curated, read-only pipelines built by our team (the “Creative All-in-One” above ships as one).
Open a template to inspect how it’s wired, then click Clone in the topbar to get your own editable copy. You can also “Save as” to clone any of your own workflows as a starting point for a new one.
Pro Tips Before You Run
A few things that save credits and prevent re-runs:
- Watch the red sockets. A required input stays red until it’s wired. If anything’s red, the run won’t validate.
- Finish and save before you run. Editing a workflow mid-run won’t apply to that run. Build it, save it, then run it. You can cancel a run anytime if you spot a mistake.
- Auto-save has your back. The first save names the workflow; after that it auto-saves with a 2-second debounce. Your pipeline persists under your Workflows to reload, clone, or delete.
- One batch source per workflow. Only a single Load image can be the batch source. Keep fixed assets (backdrops, brand references) as single Load images so they’re shared across every run.
Stop Editing App-by-App. Build It Once, Run It in One Click.
Your imagery pipeline shouldn’t be a series of browser tabs and downloads. With NeuroViz Workflows, you wire it once and produce the full try-on → retouch → creative → video set in a single click — and scale it across your entire catalog with batch.
Start free with 80 credits — no credit card required. Test a full single-image workflow today. When you’re ready to batch-process your catalog, Pro Plus and Membership unlock batch fan-out for the whole inventory.
Video tutorial: