Batch Processing Is Here – Process Hundreds of Images Automatically
We launched batch processing today. Upload hundreds of images. Process them automatically. Download all results. Manage quality. Resubmit failed generations.
This is full workflow management, not just bulk upload.
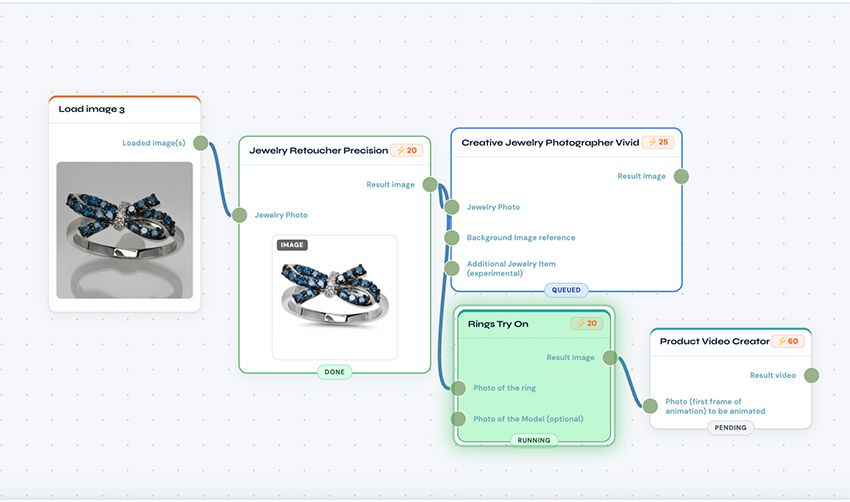
How Batch Processing Works
Step 1: Upload Files
- Click “Upload Images” in any batch-enabled application. Select multiple files. Name your batch. Click “Upload”.
- The batch name helps you organize projects. Use descriptive names: “December Rings Catalog”, “Holiday Collection Retouching”, “Client Smith Wedding Bands”.
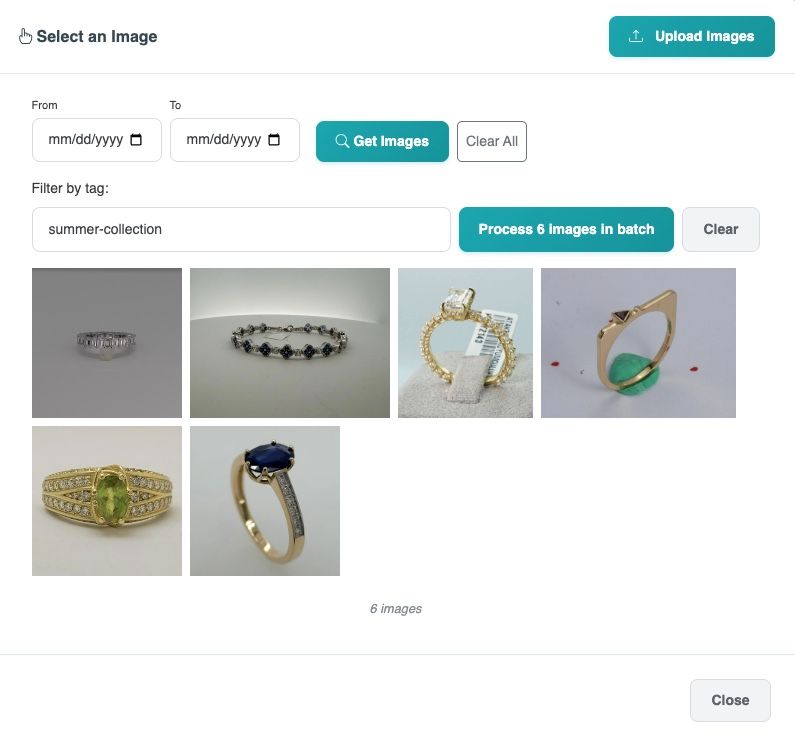
Step 2: Select and Process
- Choose your batch from the dropdown menu. You see all images in the batch. Click “Process X images in batch”.
- Configure your settings. These settings apply to all images in the batch. Review total credit cost. Click “Generate”.
- The entire batch processes automatically.
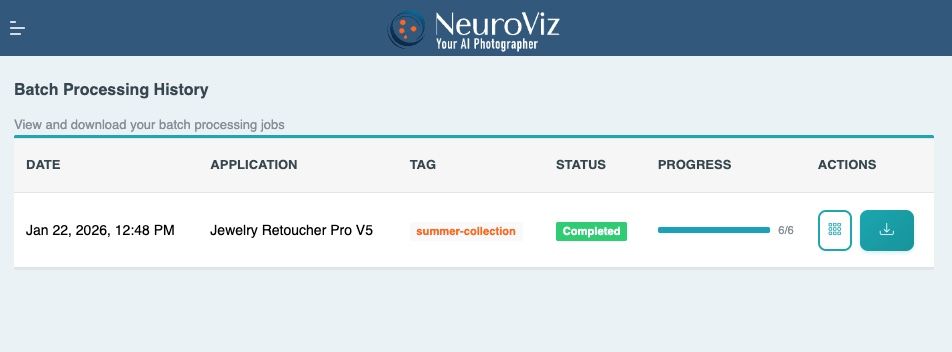
Step 3: Monitor Progress
- Go to “Batches” section. See all your batches. Check processing status. View completion progress. Each batch shows:
- Processing status
- Total images
- Processed images
- Failed images

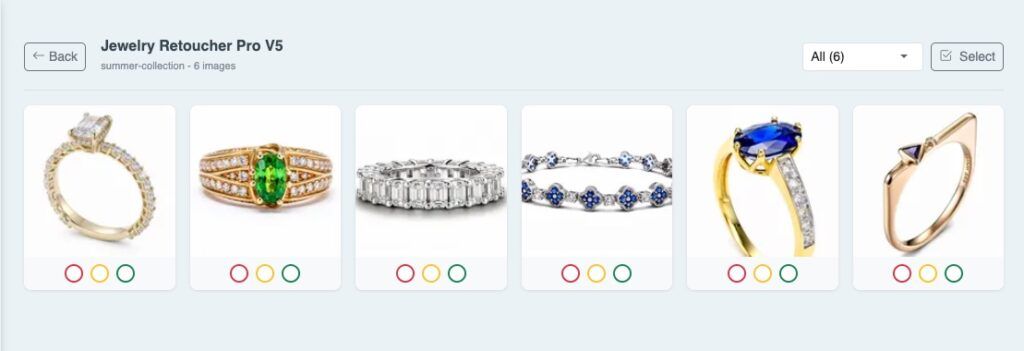
Step 4: Review Quality
- Open your batch. Each image shows generation result. Rate each result:
- Green: Good result
- Yellow: Acceptable result
- Red: Bad result, needs regeneration
- This quality rating helps you manage large batches efficiently.
Step 5: Filter and Resubmit
- Sort by rating. Filter to show only red (bad) results. Select failed images. Click “Resubmit”.
- This creates a new batch with only the failed images. Regenerate them without reprocessing successful results.
Step 6: Download Results
- Download individual images. Or download entire batch as ZIP file. ZIP file includes:
- Folder named with batch name and date
- All successfully processed images
- Original filenames preserved
Batch Management System
This isn’t just bulk upload. This is full batch management.
- Batch History: See all your batches. Check processing dates. Review completion status.
- Quality Control: Rate individual results. Filter by quality. Identify problem generations.
- Selective Resubmission: Regenerate only failed images. Don’t waste credits reprocessing good results.
- Organized Downloads: ZIP files organized by batch name. Easy file management for large projects.
Real Use Cases
- Jewelry Retailers: Upload 200 ring photos. Retouch overnight. Rate results in morning. Resubmit 15 failed images. Download ZIP with 200 retouched rings.
- E-commerce Sellers: Process seasonal catalog. 300 product photos. Generate try-ons for entire inventory. Filter by quality. Resubmit problematic generations.
- Photographers: Client photoshoot retouching. 150 jewelry images. Batch process with consistent settings. Review quality. Deliver ZIP to client.
- Brands: New collection launch. 100 pieces. Generate try-ons and retouching. Organize by batch name. Download completed batches by product category.
What Makes This Different
- Quality Management: Rating system lets you identify problems quickly. No manual review of 200 images to find the 10 bad ones. Filter by red ratings. See problems immediately.
- Selective Regeneration: Don’t reprocess entire batch when 5% fails. Resubmit only failed images. Save credits. Save time.
- Organized Workflow: Batch history tracks all your projects. Name batches by client, date, or project. Find completed work easily.
- Full Automation: Upload before bed. Process overnight. Review in morning. Resubmit failures. Download final results. Entire workflow managed.
Credit Cost
- Same per-image credit cost as individual processing. No additional batch fees.
- Failed regenerations through “Resubmit” use standard credit costs.
- Total credit cost shown before processing starts. No surprises.
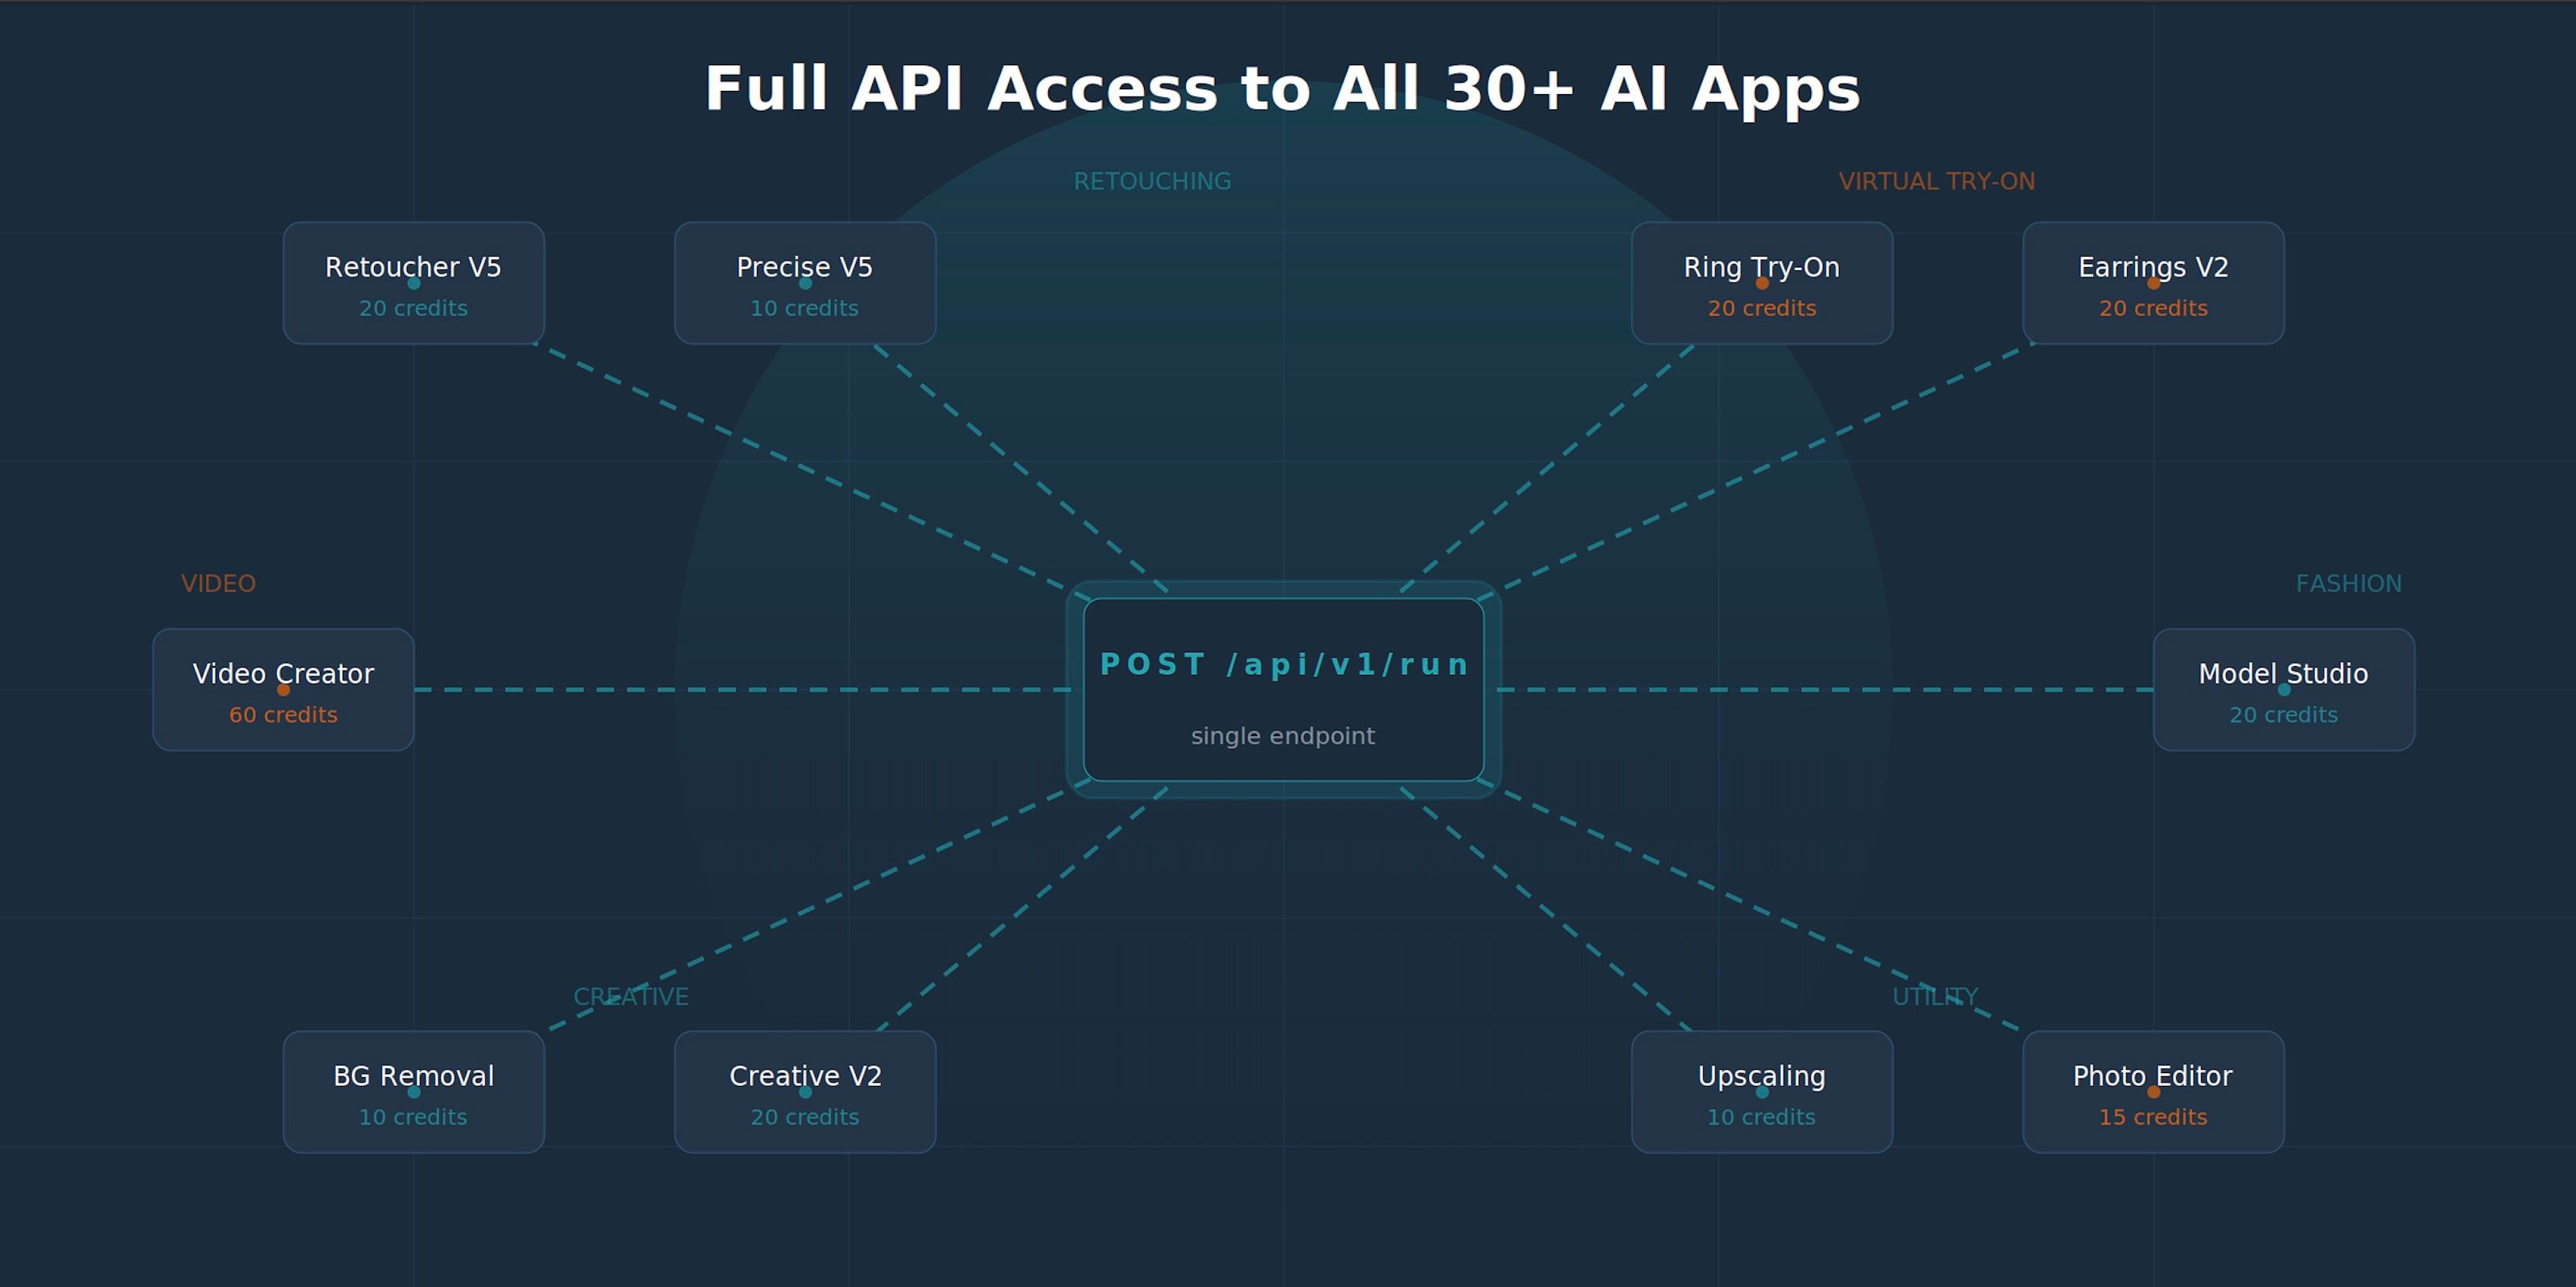
Availability
- Batch processing available on Pro Plus and Agency plans.
- Rolling out to applications throughout January 2026:
- Week 1 (Live Now): All Jewelry Retoucher Pro versions
- Week 2: Virtual Try-On applications
- Week 3: Photo generators
- Week 4: Video and 3D tools
- Look for batch icon on application list.
Getting Started
- For New Users: Upgrade to Pro Plus or Agency plan. Look for “Batch Processing” option in supported applications. Upload your first batch.
- For Current Pro Plus/Agency Users: Open any batch-enabled application. Click “Upload Images”. Select multiple files. Name batch. Start processing.
Best Practices
- Batch Naming: Use descriptive names. Include date, project, or client. “2026-01-15 Wedding Bands Client Jones” works better than “Batch 1”.
- Batch Size: Keep batches under 200 images for easier management. Larger batches work but take longer to review and download.
- Quality Rating: Rate images immediately after processing. Don’t wait until you have 500 unrated images. Stay organized.
- Settings Consistency: Remember settings apply to entire batch. Double-check before processing. Changing settings mid-batch requires new batch.
What’s Next
- Batch processing rolls out to more applications this month. Watch for batch icon appearing in your favorite tools.
- We’re building additional batch management features:
- Batch templates (save settings for repeated workflows)
- Scheduled processing (set batches to run at specific times)
- Batch analytics (track success rates, credit usage per batch)
- These features launch Q1 2026.
Start Using Batch Processing
- Pro Plus and Agency users: Log into your dashboard. Open batch-enabled application. Look for “Upload Images” button.
- Not on Pro Plus or Agency? Upgrade here: pricing
- Questions about batch processing? Contact support@neuroviz.ai